Documenting Kotlin code using Kdoc and Dokka

What is documentation
Code documentation is a description and comments explaining how code works and how to use it. Clearly documented code has a number of advantages including easier collaboration among team members, improved code maintenance, improved code quality, and also increases code reuse as it's easier to reuse code that is well documented.
Different ways to document your code
Inline comments - these are comments explaining the functionality of a particular piece of code
Repository Readme - This documentation provides answers and helpful information such as how to set up a project/library, how to run tests, included dependencies, etc. Basically provides essential information to get started.
API documentation - This is a reference to how to use an API and gives detailed info on the methods, functions, and how to integrate them for different use cases.
Using dokka and kdoc for kotlin code documentation
You will need to set up Dokka which is pretty straightforward. Reference their official documentation for detailed info.
Apply the Gradle plugin for Dokka in the root build script of your project:
 plugins {
     id("org.jetbrains.dokka") version "1.8.20"
 }
When documenting multi-project builds, you need to apply the Gradle plugin for Dokka within subprojects as well:
 subprojects {
     apply(plugin = "org.jetbrains.dokka")
 }
Once Dokka is set up we can now start documenting using kdoc. Kdoc syntax is basically the same as Javadoc comments start with /** and end with */
In this sample, we will see how to document using Kdoc by leveraging some of the supported Block tags by Kdoc and normal documenting syntax /** */
Some of the Block tags used in the sample below and their use cases.
@author -> Specifies the author of the element being documented.
@see -> Adds a link to the specified class or method to the See also block of the documentation.
@since -> Specifies the version of the software in which the element being documented was introduced.
@param -> Documents a value parameter of a function or a type parameter of a class, property, or function.
@return -> Documents the return value of a function.
@receiver -> Documents the receiver of an extension function.
@constructor -> Documents the primary constructor of a class.
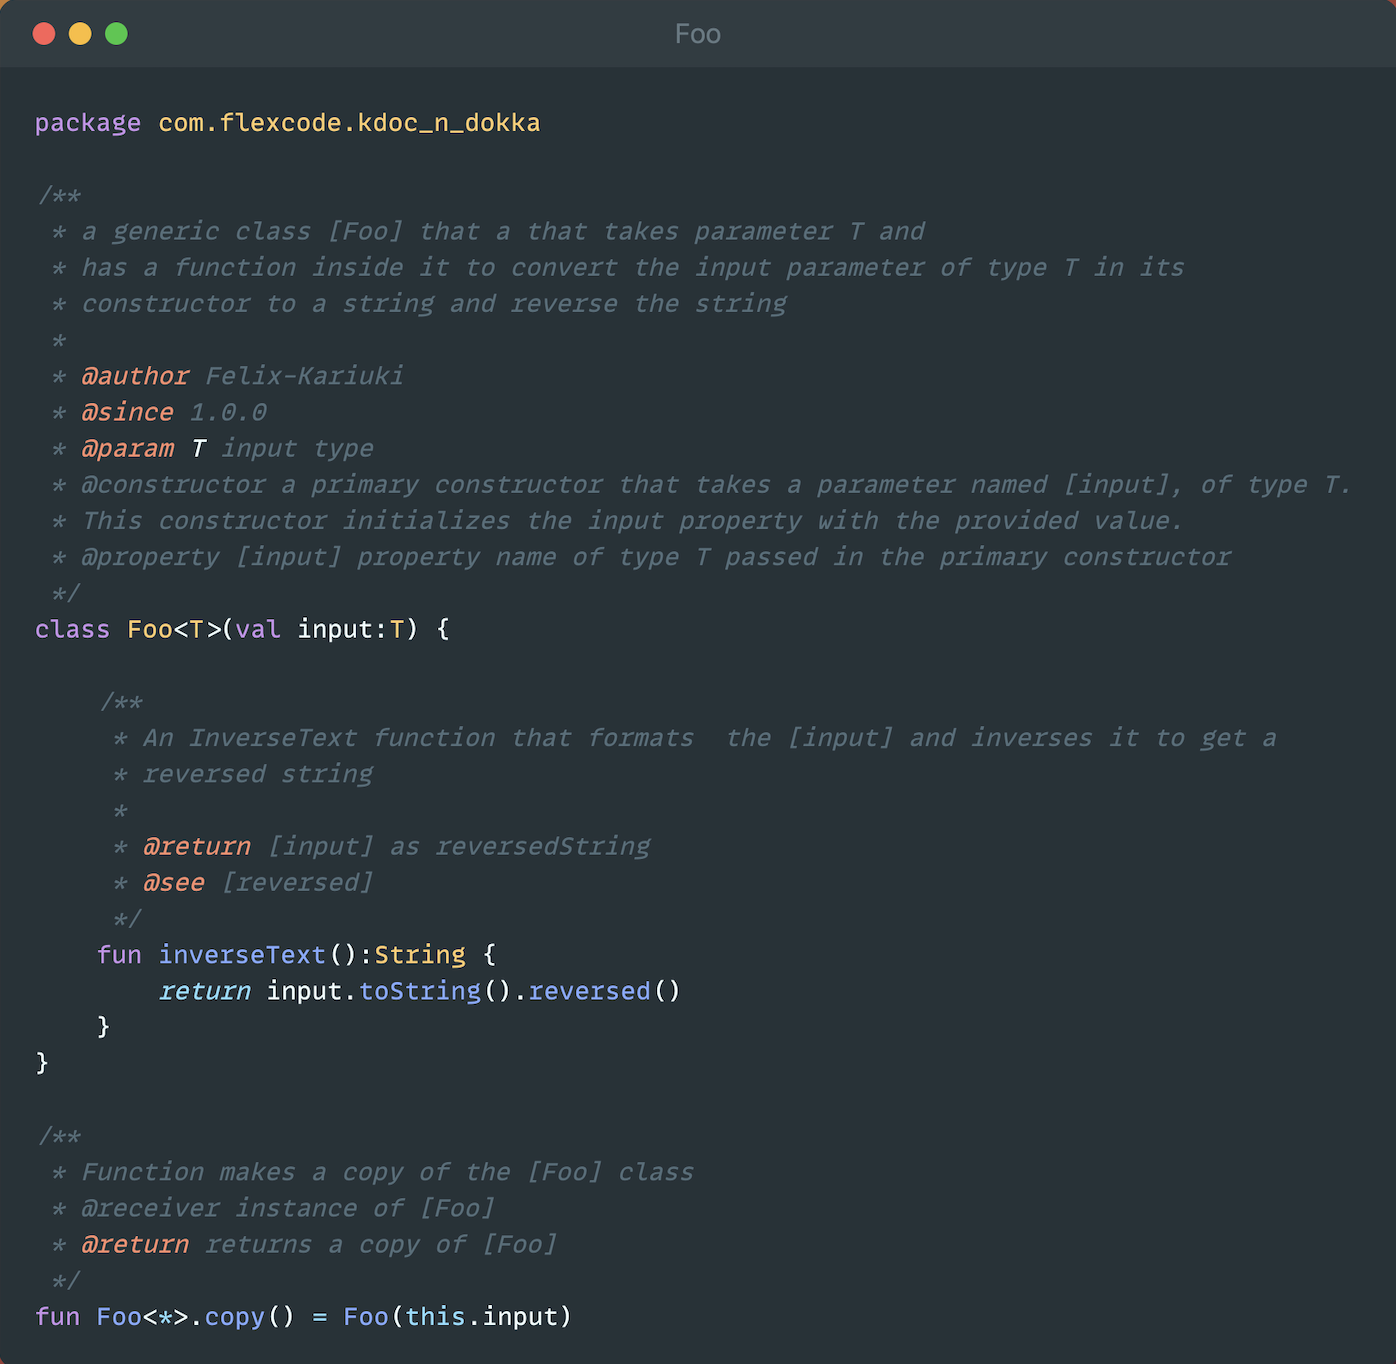
The above code snippet outlines documentation of a generic Foo class that takes an input type of type T in its constructor and has a function to convert the input into a string and reverse the string to return a reversed string.
NOTE:
adding square brackets [ ] creates a reference to an element for instance in the above example the property "input" in the primary constructor is referenced but putting it in square brackets i.e [input]
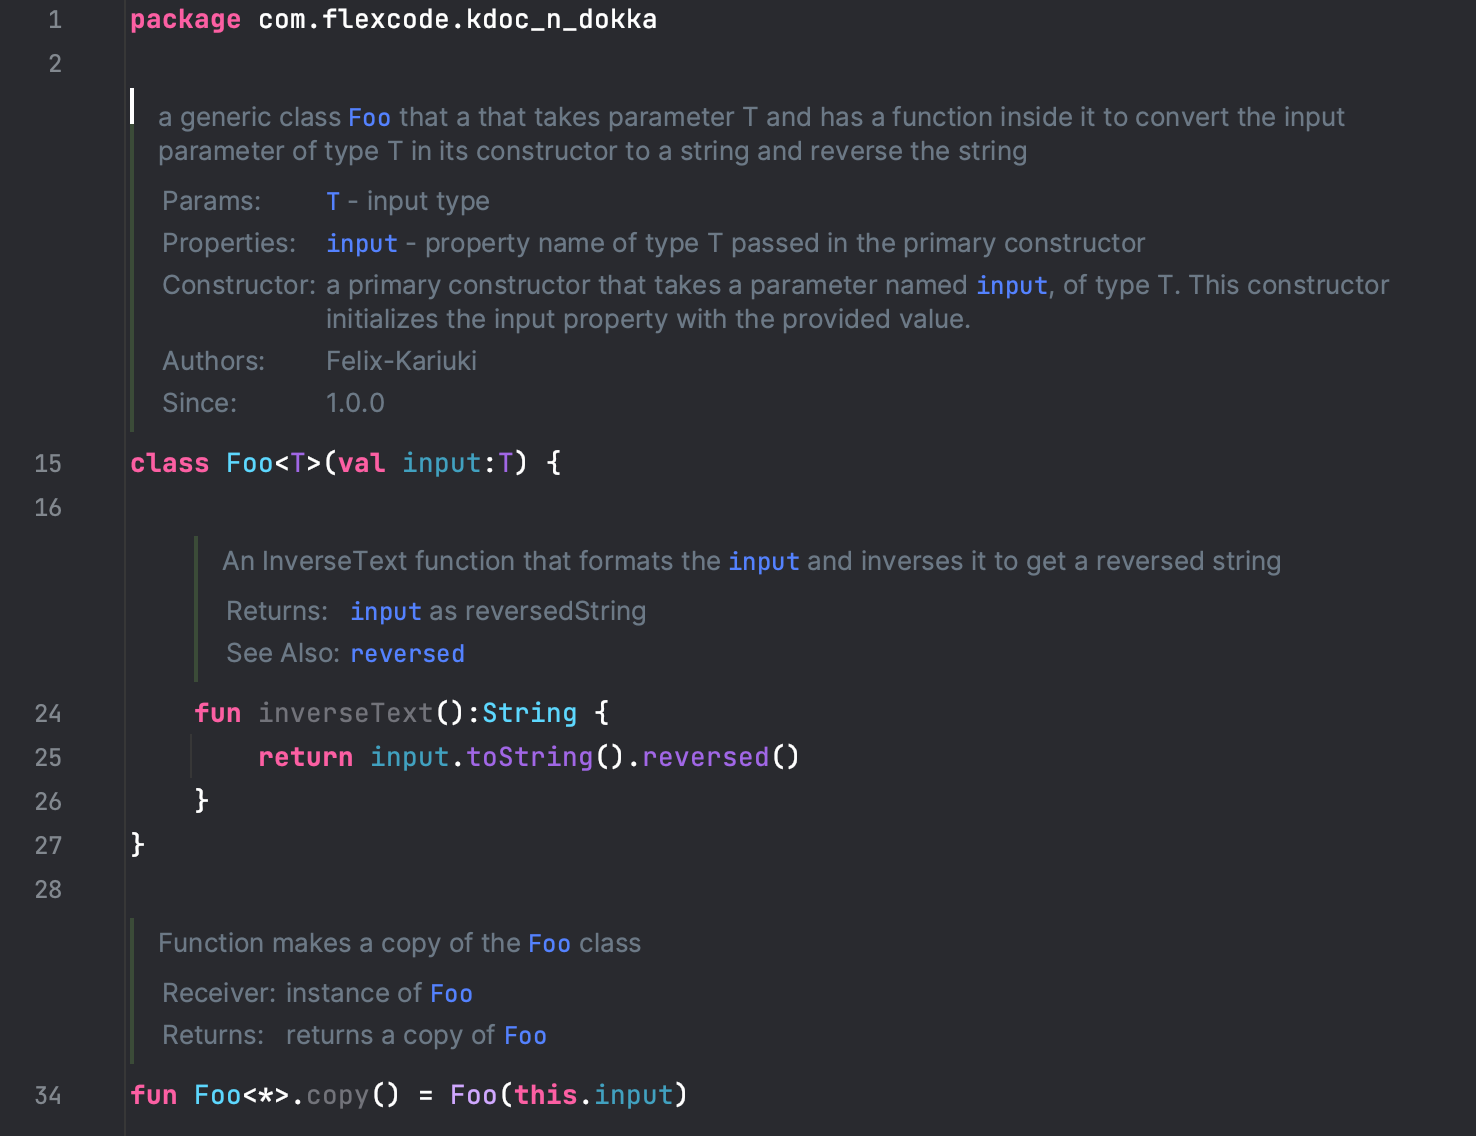
A quick preview of the documented code looks like this:
Exporting /Generating Documentation using Dokka
To generate the documentation of your code as an html format run this command on the terminal
./gradlew dokkaHtml
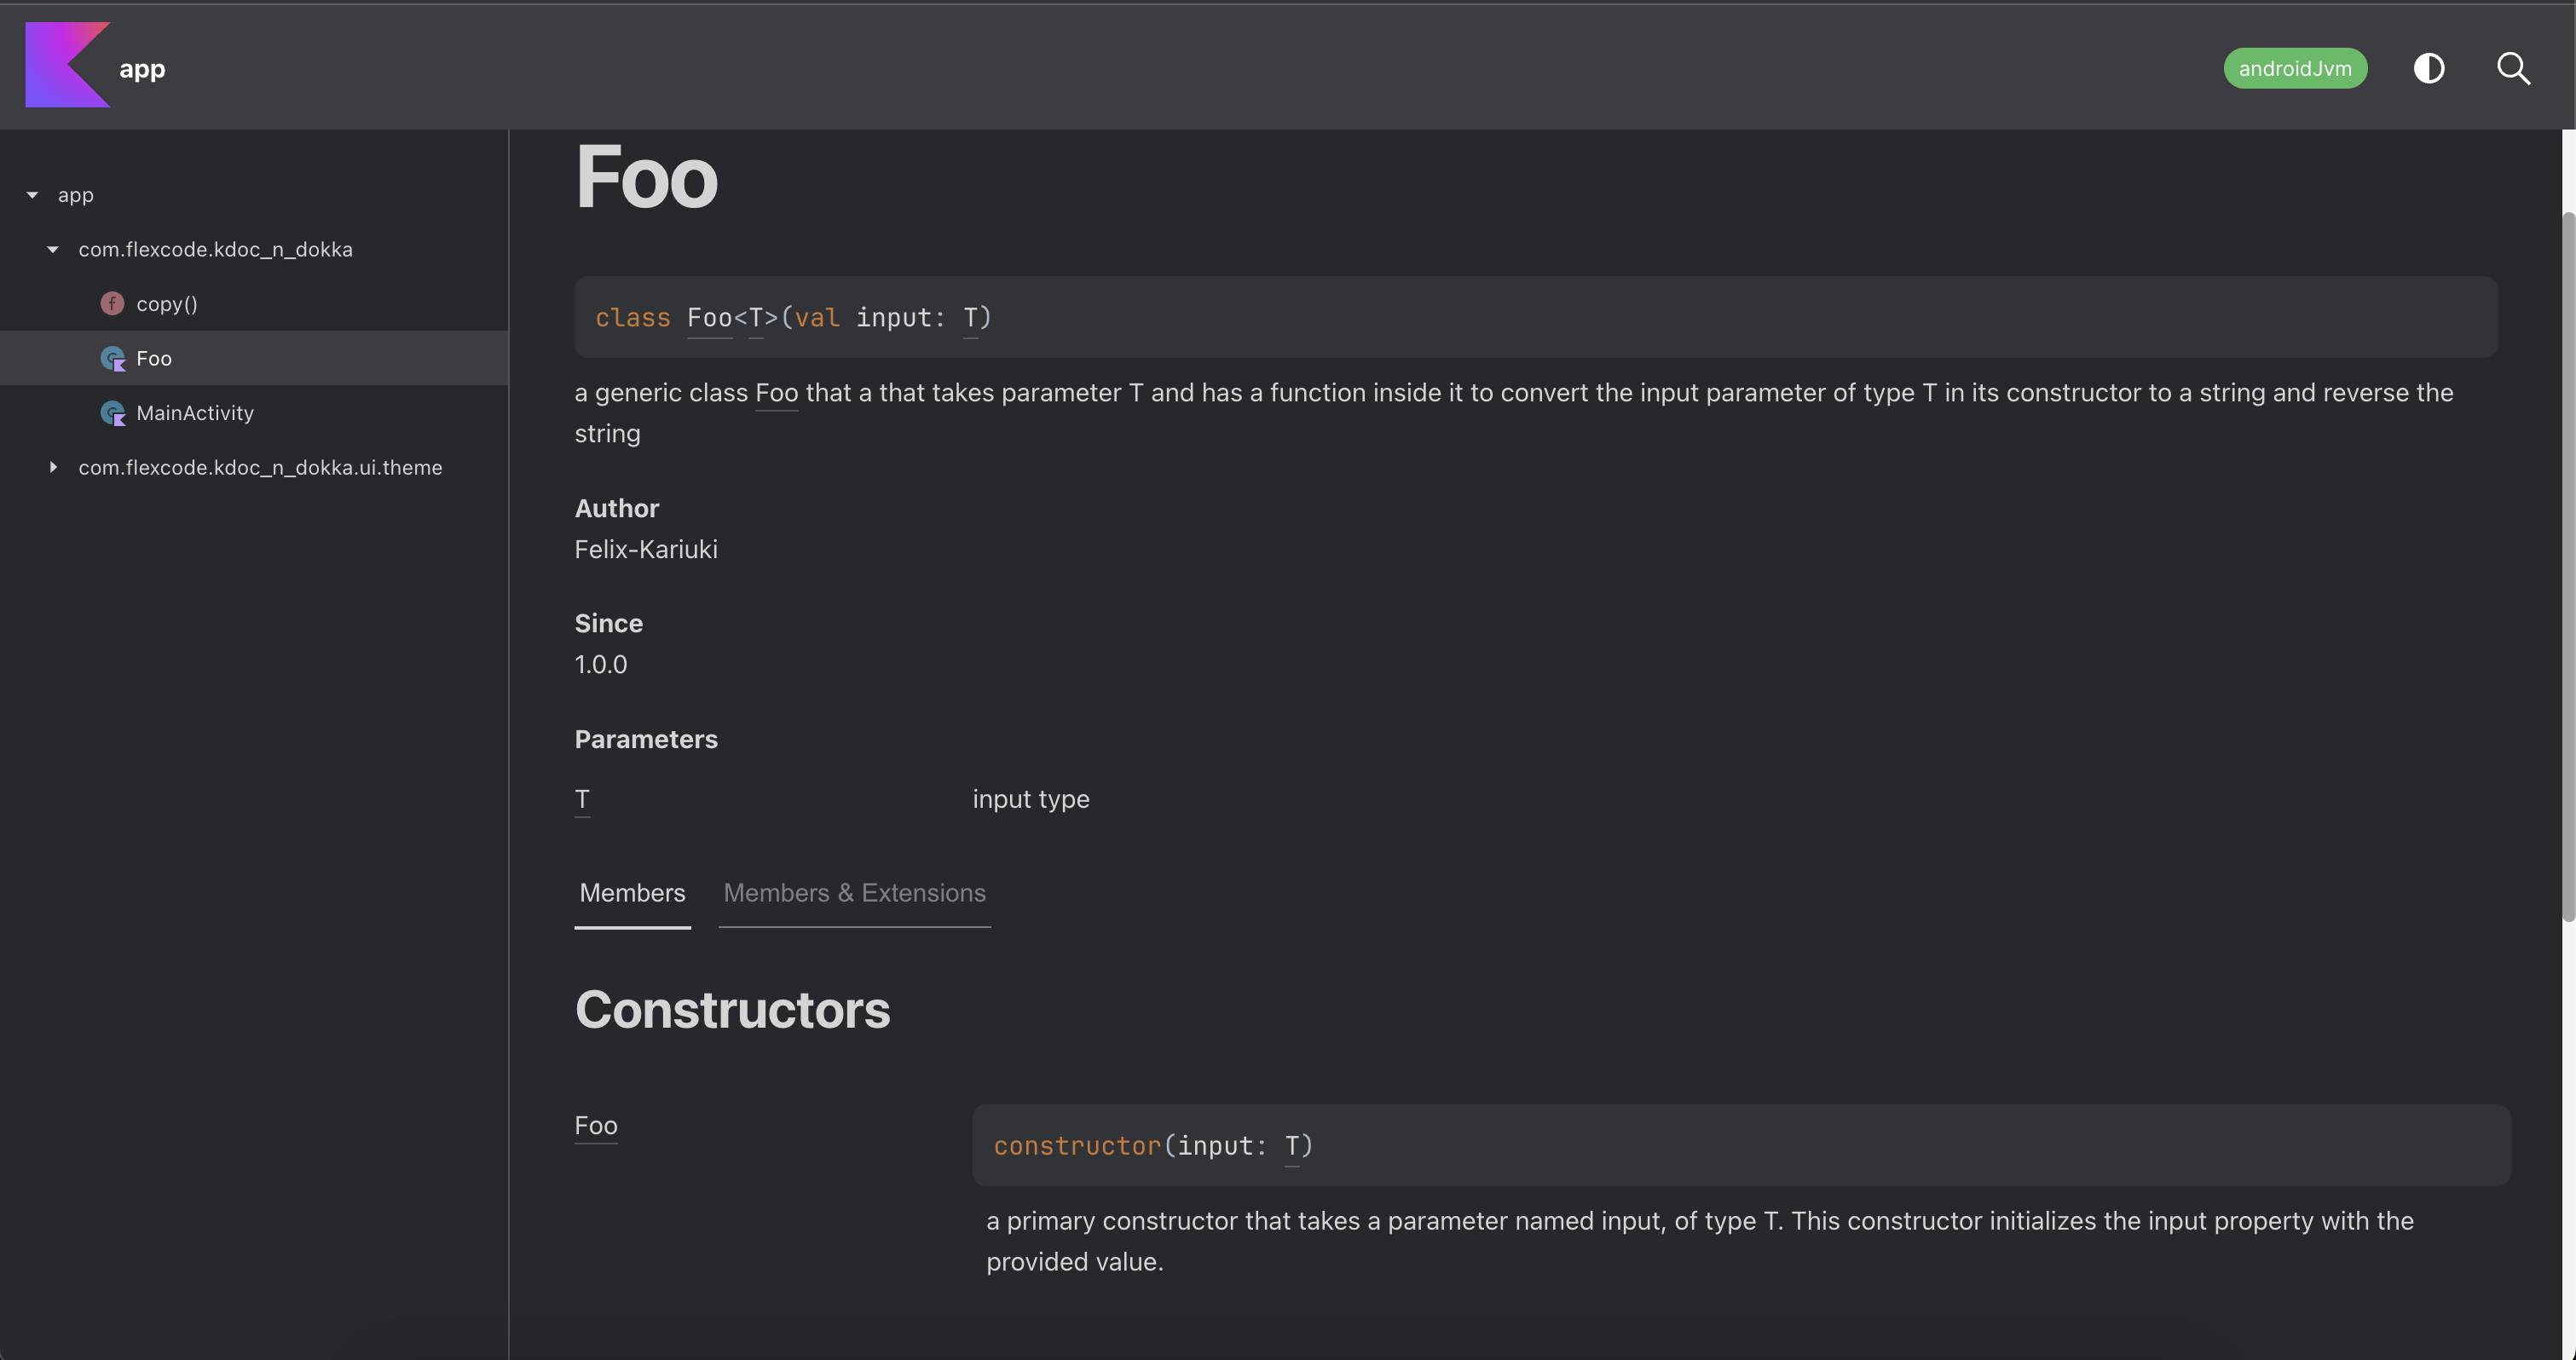
This generates an html file of your documentation and can be found in the build scripts under app module when viewing the project in project mode as shown below.

the generated html format of the documentation:
You can use the generated documentation by kdock to suit any usecases that you may like...
Note:
You can upload the generated HTML documentation by Dokka on GitHub pages and use it as the official documentation of your code. more on that in the next article.
Thanks for following the article to this point. For any questions/clarifications:
Reach out
X -> https://twitter.com/felixkariuki_
LinkedIn -> https://www.linkedin.com/in/felix-kariuki/
Github -> https://github.com/Felix-Kariuki
In part 2 of this article, we will discuss documenting modules and packages and best practices in code documentation.
👋 see you soon

